Silky waterfalls, gloomy clouds and still reflections are the photos that come in mind when someone says “landscape photography”. But how to capture those wallpaper type pictures ? In this article, I will be talking about the appropriate settings you can use for getting sharp and colorful results.
What aperture to use, which shutter speed and ISO to use, the concept of hyperfocal distance and a few lens recommendations. This article will be a quick-start guide to landscape photography.
Which aperture value to use ?
You must have seen values like f/22, f/5.6 and others in your camera. This refers to the “f-stop” of your camera, which is related to the aperture of your lens.
Aperture refers to the opening of the lens. It is basically a hole which allows light to come in the camera. Bigger the aperture, more the light that comes in. But f-stop is actually the inverse of the aperture. So, bigger the f-stop, lower your aperture. What this means is that f/22 is actually a very small aperture, and thus lets in very less light. Similarly, f/2.8 or f/3.5 is a bigger aperture and lets in a lot of light.
But how do all these numbers affect your landscape shot ?
Well, smaller the aperture, sharper the photo across the frame. In other words, an aperture which is small – or a big f-stop number – should make your photo sharper. So, ideally, f/16 or f/22 is what your should use.
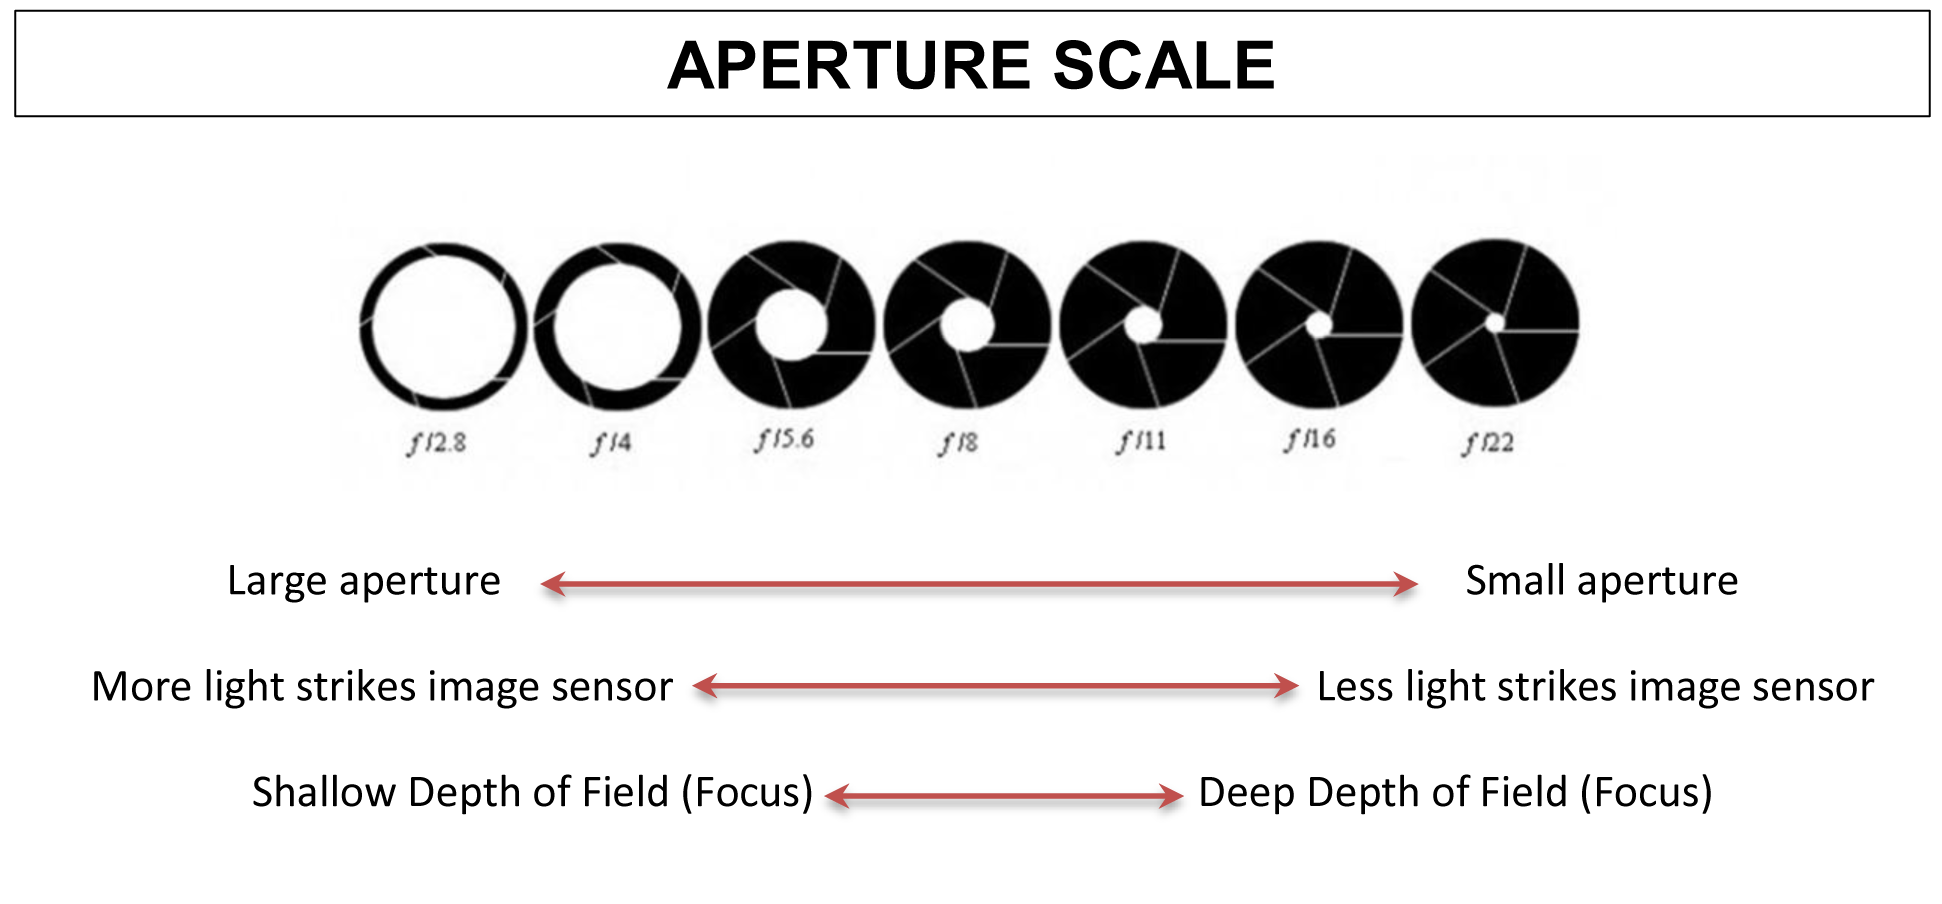
Which aperture to use
However, there is one more thing you should remember while setting up your camera for landscape photography. Very small apertures cause a phenomenon called diffraction, which is simply bending of light around very small objects. This diffraction makes your photo a bit soft, even though a smaller aperture should make it sharper.
So, simply put, just because small apertures give sharpness, does not mean you should set an extreme aperture value. F/22 is actually an extreme value, and will not give a sharp result like it should because of diffraction.
You should try to keep your apertures somewhere around f/11, as it is big enough to overcome diffraction, but also small enough to give sharpness all over the scene. You should also use a tripod whenever possible, as a small aperture will require long shutter speeds to let in enough light.
What about shutter speed and ISO ?
If your aperture is small and f-stop big, you will need to either increase your ISO, or decrease the speed of your shutter so that more light is let in. If you have a tripod, you should try to keep your ISO to the minimum and change only shutter speed.
A long shutter speed and a steady tripod will let you show motion in your image. A flowing river will be made silky smooth and the clouds will start to look like ribbons from a speed of 1 sec onwards. If at all you want to keep your shutter speed long and it is bright daylight, you will have to use an ND Filter or something similar, as it will reduce the light coming in. Because you cannot keep lowering your shutter speed and ISO and aperture, ND filters do come in handy.
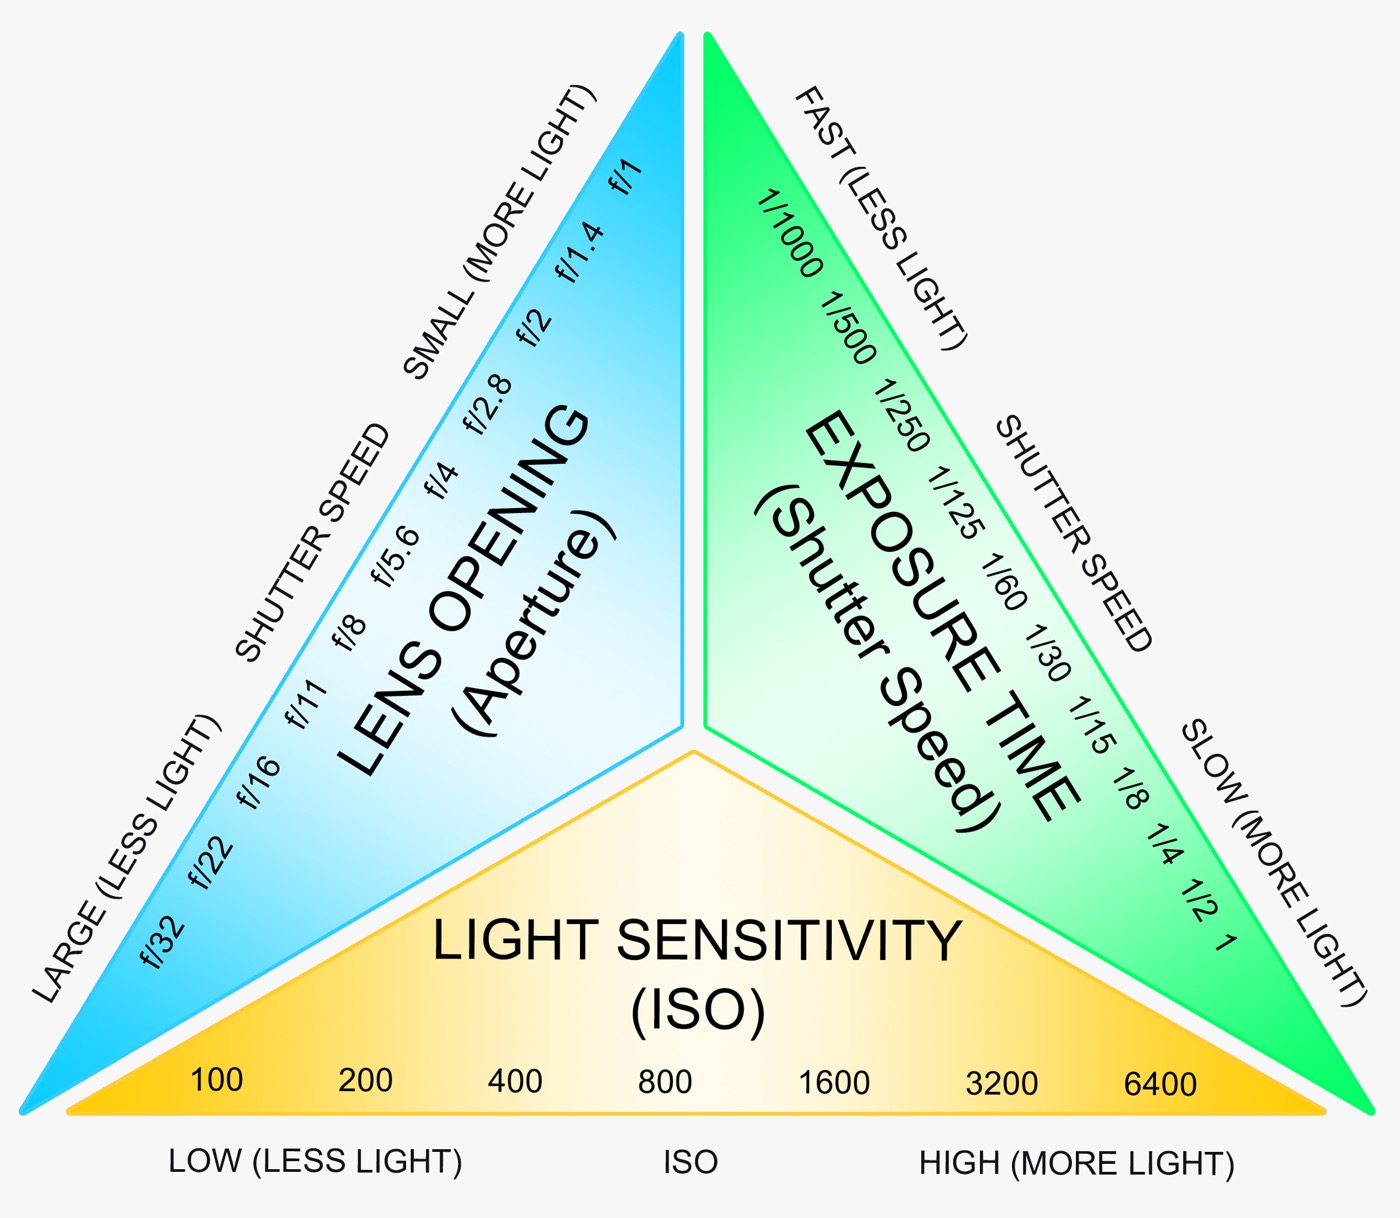
Balancing ISO Shutter Speed Aperture
A tripod also has the added advantage of letting you finalize and fix your composition easily. And because you are not concerned about slow shutter speeds anymore, you can reduce the ISO too! The lack of light from aperture and ISO will be compensated for by a long shutter speed and a stable tripod.
As for changing the ISO, you should increase it only if you don’t have a tripod and need a fast shutter speed to hand hold your camera. A high ISO will lead to noise, whereas a low ISO will give a clean and sharp image.
Thus, an aperture of around f/11, a shutter speed which is long enough to make the exposure right, and a low ISO of about 100-200 should make for a good starting point for landscape photography. It is all a matter of balancing ISO, shutter speed and aperture to give the exposure and the artistic effect – motion blur and star trails and other such effects – you want in your image.
Hyperfocal distance
If you have set your focal length and are not zooming in and out anymore, focusing at the hyperfocal distance for that focal length – along with the right aperture – will give you sharpness over the entire scene.
It only sounds complex. But hyperfocal distances can be calculated easily if you have set your focal length and your aperture. Because there a lot of hyperfocal distance calculators available online, I won’t boggle your mind with mathematics.
A general rule is that the hyperfocal distance will be somewhere around 1/3rd into your scene. Although it is only a rough approximation, you should keep it in mind in case you cannot get the exact hyperfocal distance.
Just refer to this chart to see at what distance you have to focus for a given combination of aperture and focal length. If you do want to see how the hyperfocal distance is calculated, you can visit sites like dofmaster.com and outsight.com which have hyperfocal distance calculators and formulas.
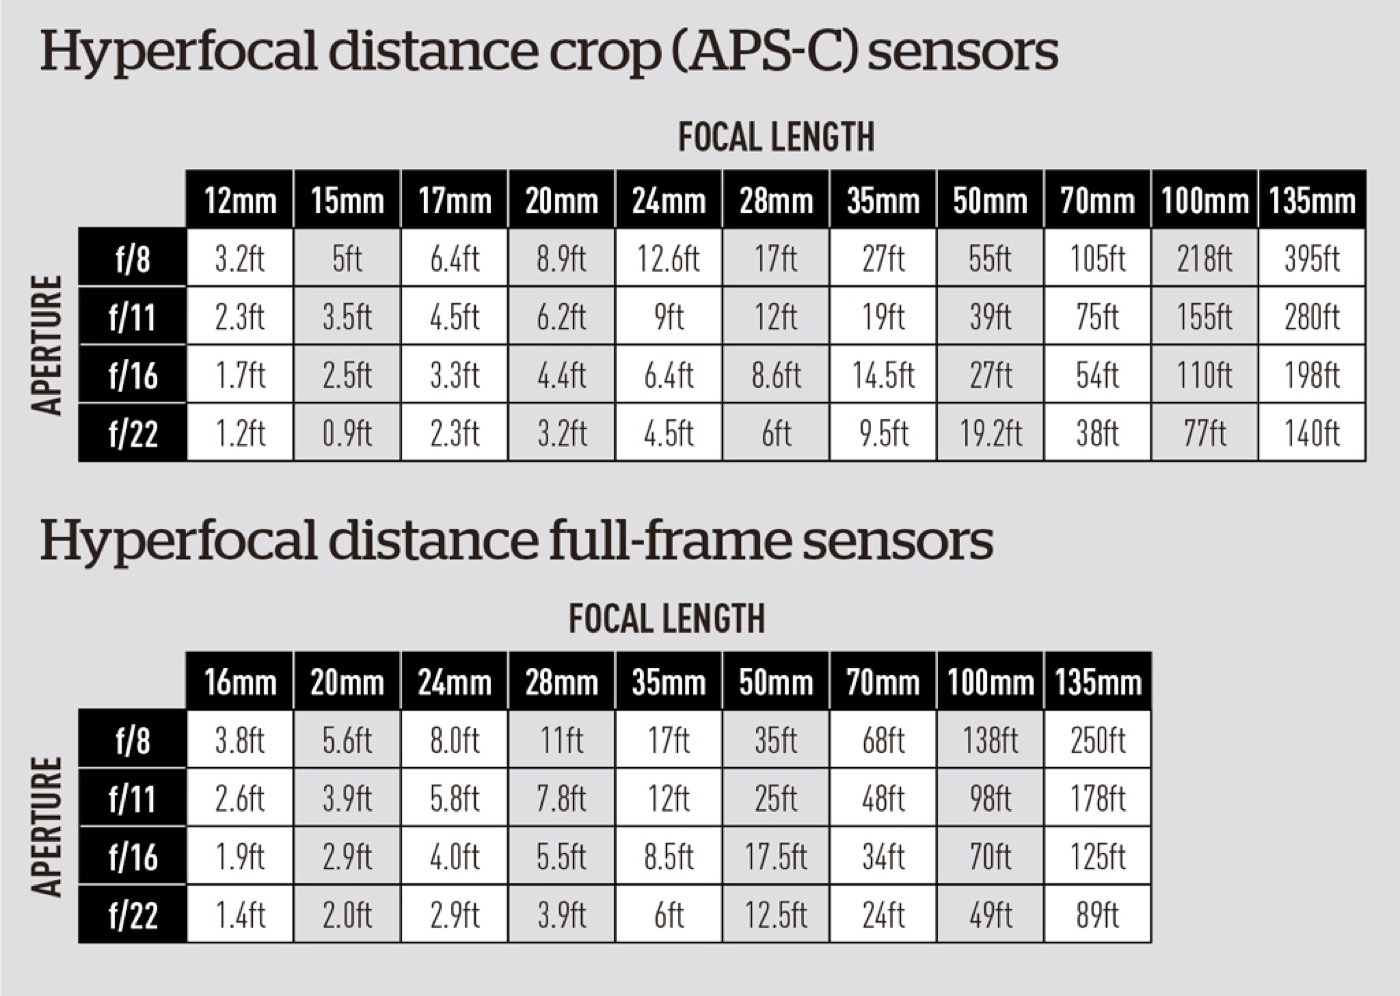
Hyperfocal Distance Chart
A few lenses to get you started with landscapes
There are hundreds of lenses available for almost every camera. The lens you need will depend on your shooting style. Some prefer to have a wide angle lens so that they can include the whole scene. Some like a mid-range telephoto, with focal length around 50-70 mm, which can go wide enough, and also zoom in on a particular part of the scene. I have seen even 70-200 mm lenses being used for landscapes, as they compress the background and do not emphasize the foreground a lot.
A good standard lens like the Canon 15-85 mm f/3.5-5.6 IS USM is a good lens to start with. The range is versatile and you get image stabilization. There is also the Nikkor 14-24 mm f/2.8 lens, which has a big aperture to let you shoot well in low-light.
For an ultra-wide lens, you can check out the Tamron 10-24 mm f/3.5-4.5, which can be found for less than $500. If you want something with a little more zoom range, the 70-200 mm lenses are a great all-rounder choice.
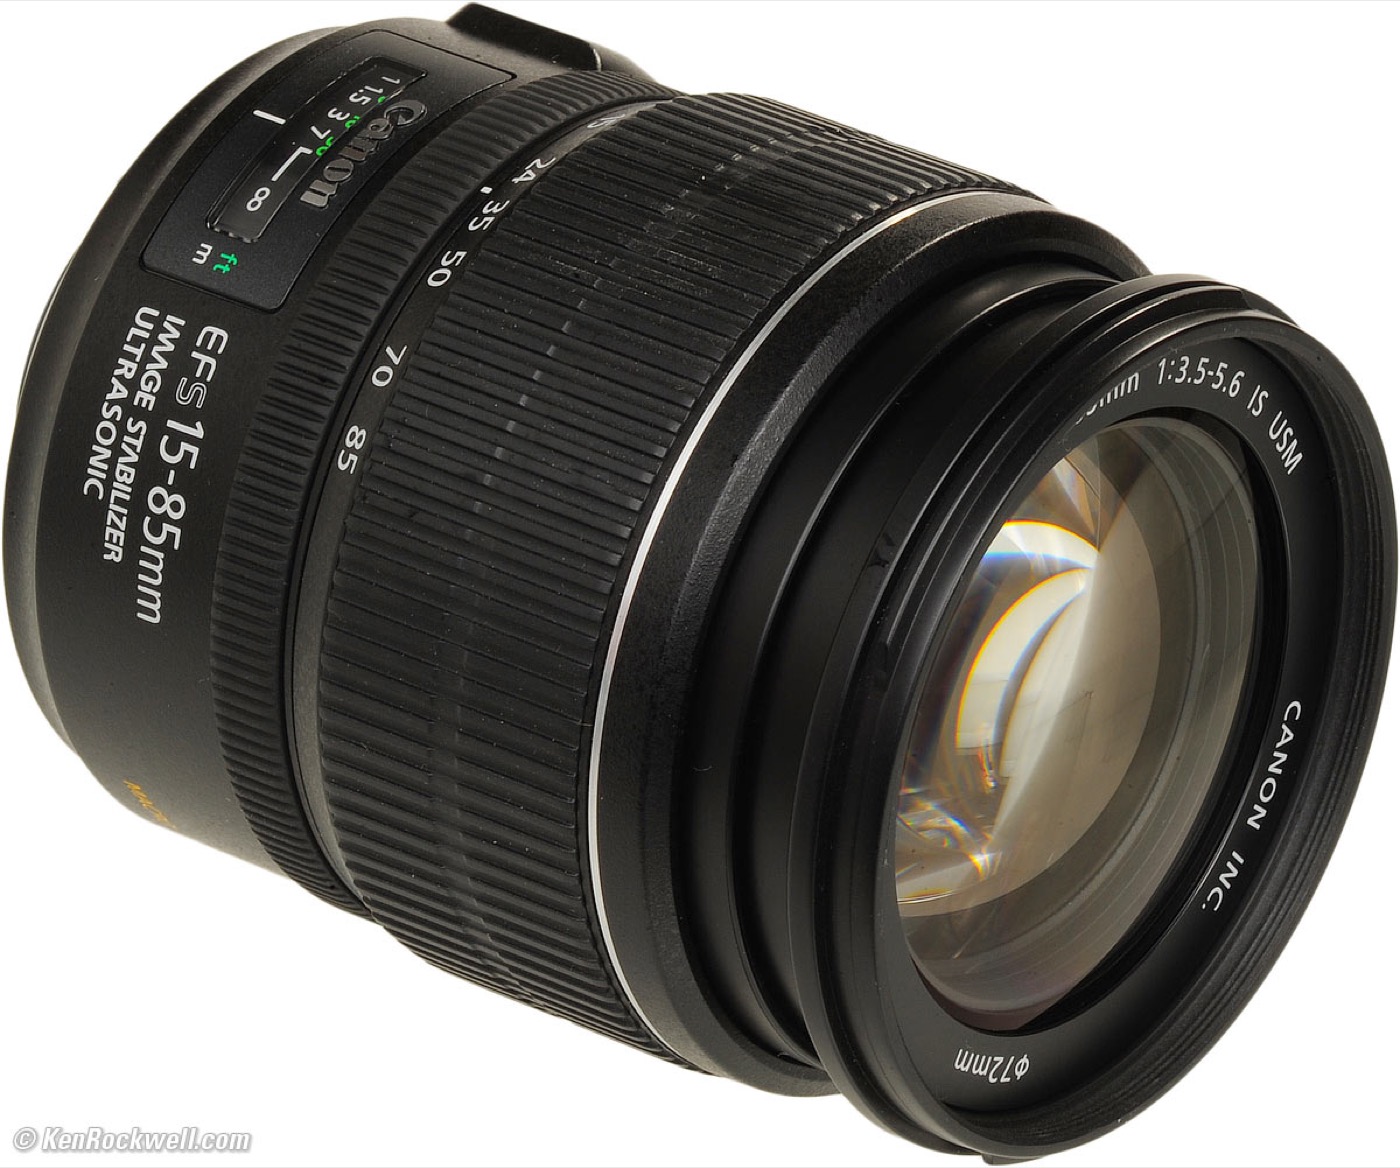
Canon Wide Angle Lens
That was a long read, I know. But I hope you got an idea of how to balance ISO, shutter speed and aperture for your landscape photography. The idea is to get an even exposure along with the motion you are trying to show, or trying to freeze. Landscape photography is fun, and once you learn how to setup your camera and balance the settings, you will be able to get beautiful images within minutes.
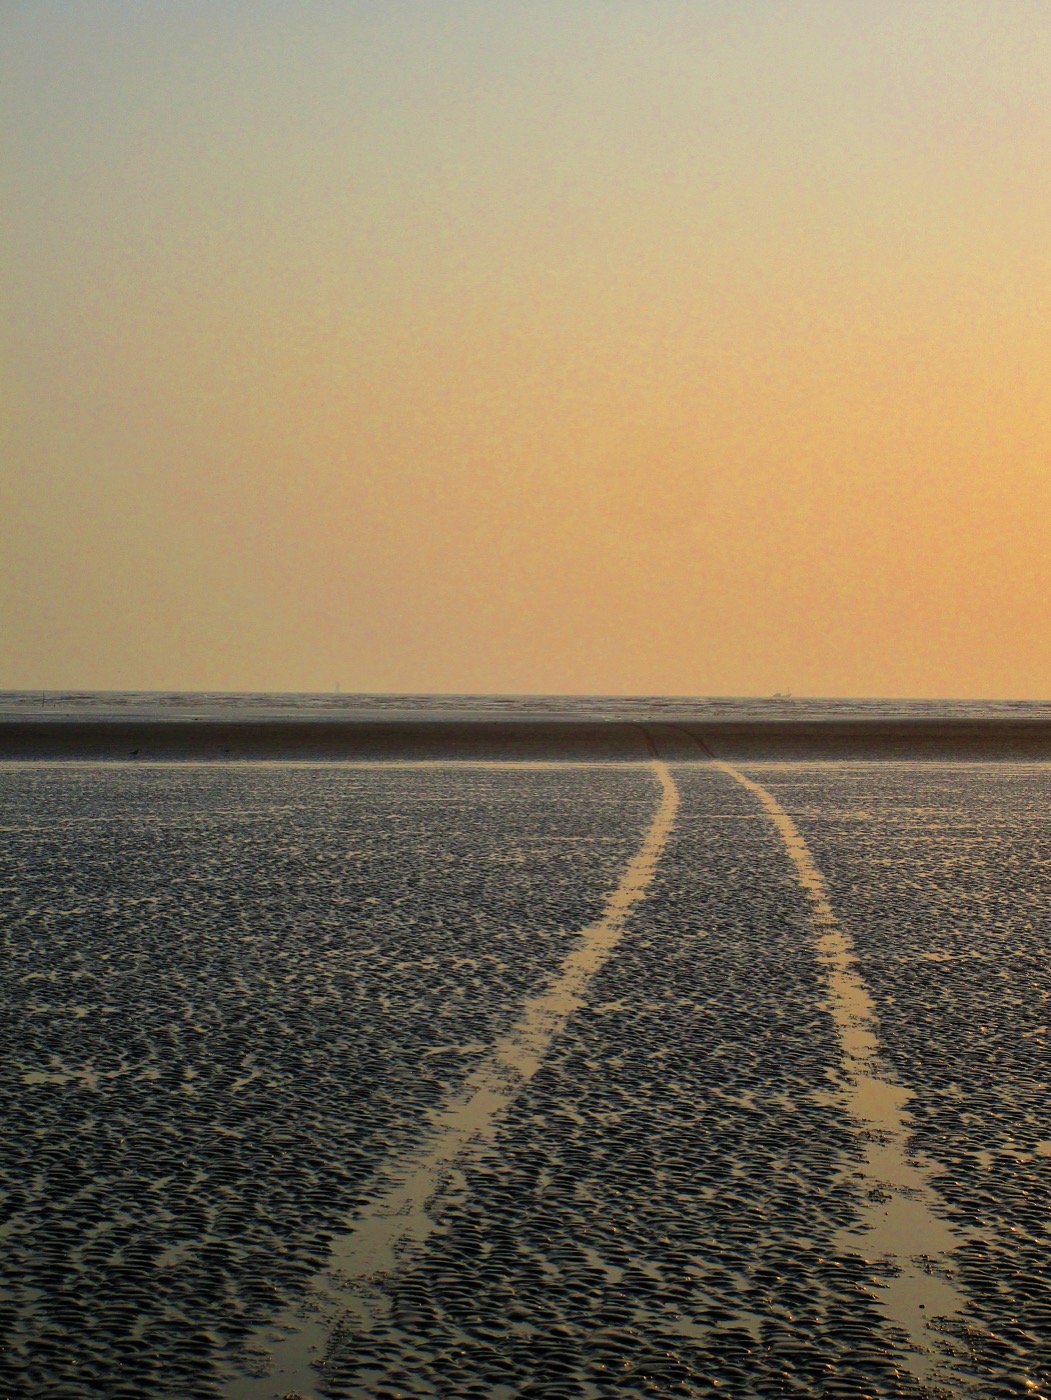
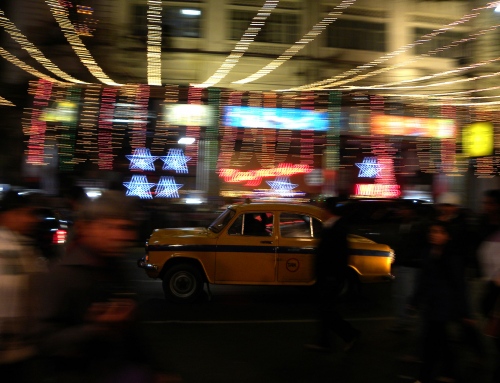
The image depicts use of an aperture of f/10 with ISO 100 and a short shutter speed.